How to use
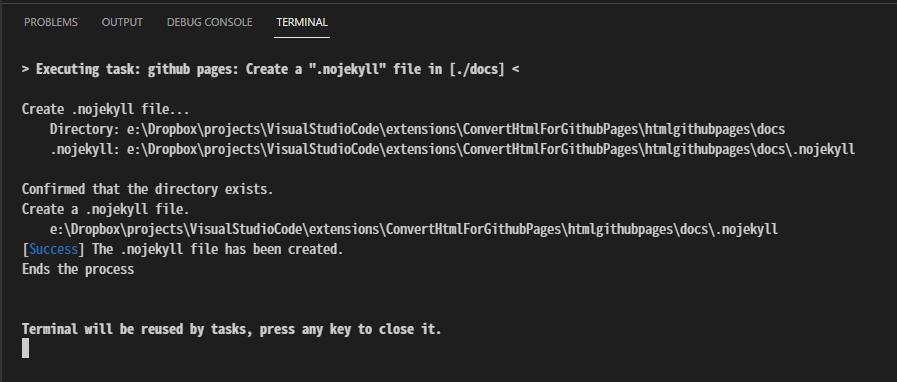
Task to create a .nojekyll file
GitHub Pages allows you to publish html in the [Root] directory of the repository or in the [Root]/docs directory.
You can disable hosting of jekyll by placing an empty file .nojekyll directly under the directory to be published.
This extension will create a .nojekyll file directly under the [workspace folder] or [workspace folder]/docs folder you have open in VSCode.
Procedure
Open the workspace folder (
File> Open Folder...)Open the root Git repository you want to publish.
Only one workspace folder should be opened. (If you have more than one workspace folder open, the workspace that VSCode recognizes as the first index will be processed.)
Select the menu item
Terminal> Run Task...From the dialog, select
github pages > Create a ".nojekyll" file in [workspaceFolder(. /)]orgithub pages > Create a ".nojekyll" file in [. /docs].If you see the following option, select
Never scan the task output for github pages tasksand this option will not appear in the future (Even if you chooseNever scan the task output for github pages tasks, the status of the process will still be shown in the Terminal)A
.nojekyllfile will be created in theworkspaceFolderordocsfolder.If the
docsfolder does not exist, it will be created automatically.
If everything is OK, press any key in Terminal to close it.
See also
For detailed specifications, see Details of each function.
Task to pass for GitHub Pages
This extension does not allow you to make direct changes to HTML files that have been tested locally. Please work with a separate folder for the documentation (HTML) and a separate folder for publishing to GitHub Pages.
Procedure
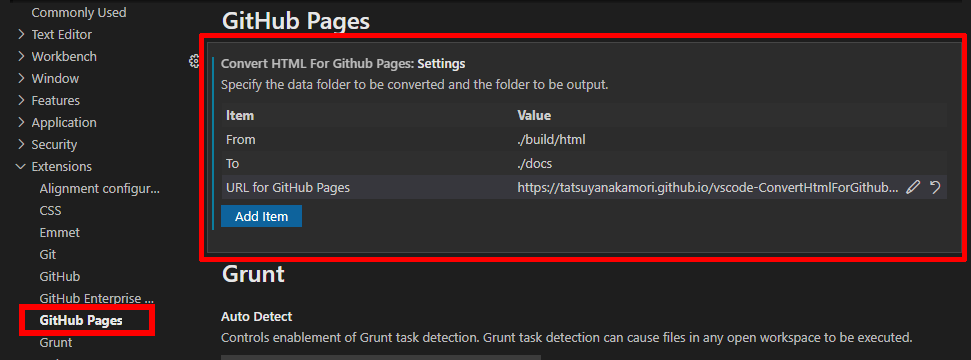
Open the Settings tab from the menu
File> Preferences> Settings.Select
Extensions> GitHub Pagesfrom the Settings category.Specify the source directory as
Fromand the destination directory asTo.It can be specified relative to the workspace folder.
Specify the current directory (workspace folder) using the notation
..Specifies the upper hierarchy using the
..notation.If the directory to copy to does not exist, it will be created automatically.
You can also specify an absolute path.
In the
URL for GitHub Pagesfield, enter the URL you want to publish to.In
https://<USERNAME>.github.io/<REPOSITORY>/, rewrite the<USERNAME>and<REPOSITORY>parts.If you change
<REPOSITORY>to${DIR_NAME}, it will be replaced by the workspace folder name (case-sensitive).
Select
Terminal> Run Task...from the menu.From the dialog, select
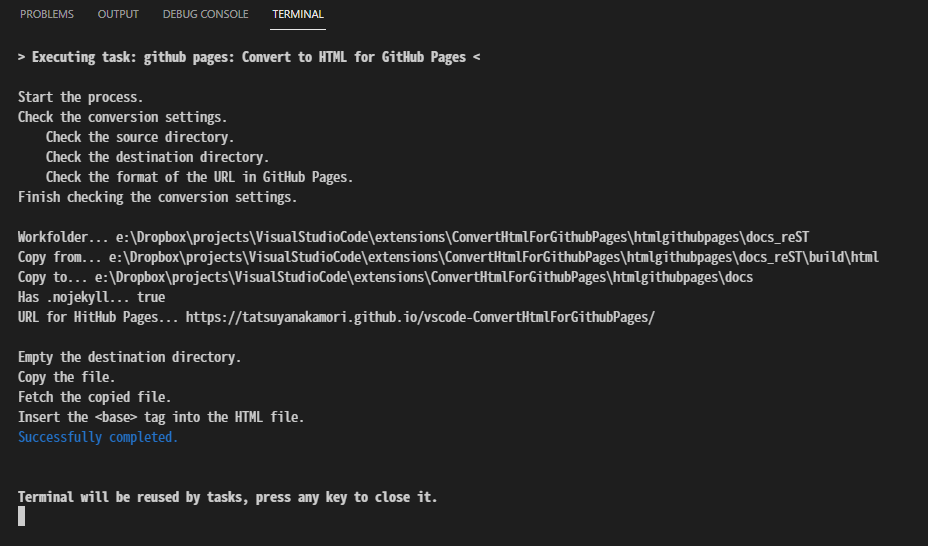
github pages > Convert to HTML for GitHub Pages.If you see the following option, select
Never scan the task output for github pages tasksand this option will not appear in the future (Even if you chooseNever scan the task output for github pages tasks, the status of the process will still be shown in the Terminal)The contents of the source directory will be copied into the destination directory, and
<base>tags will be inserted into the<head>of each HTML file.If everything is OK, press any key in Terminal to close it.
See also
For detailed specifications, see Details of each function.


